本文转自:https://www.petenetlive.com/KB/Article/0000685
Problem
Note: The procedure is the same for Server 2016 and 2019
This week I was configuring some 2008 R2 RADIUS authentication, so I thought I’d take a look at how Microsoft have changed the process for 2012. The whole thing was surprisingly painless.
I will say that Kerberos Authentication is a LOT easier to configure, but I’ve yet to test that with 2012, (watch this space).
Solution
Step 1 Configure the ASA for AAA RADIUS Authentication
1. Connect to your ASDM, > Configuration.
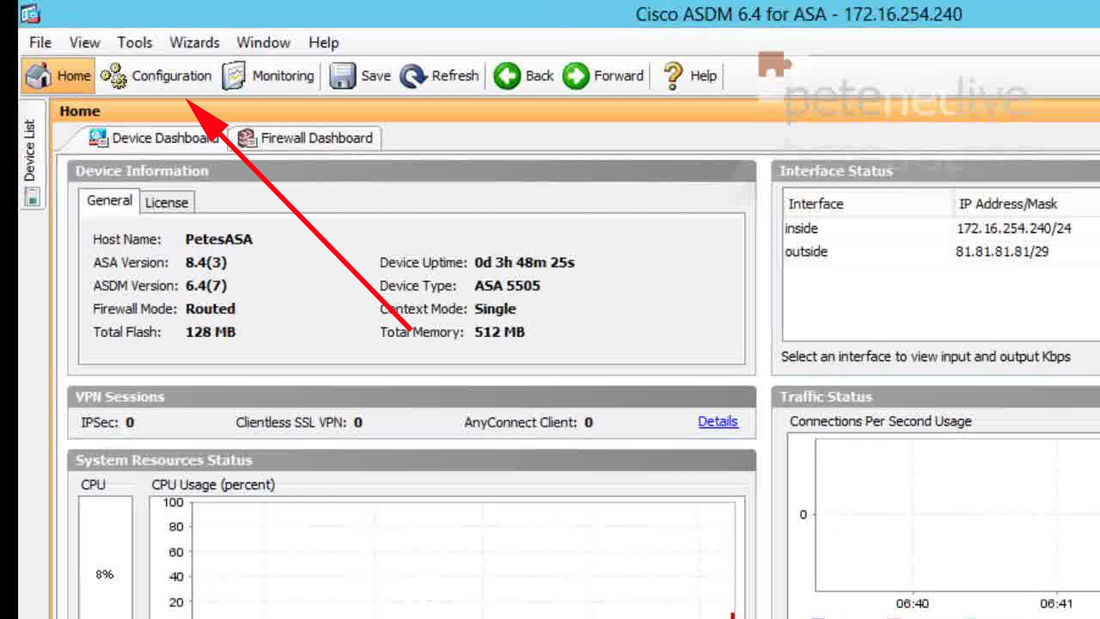
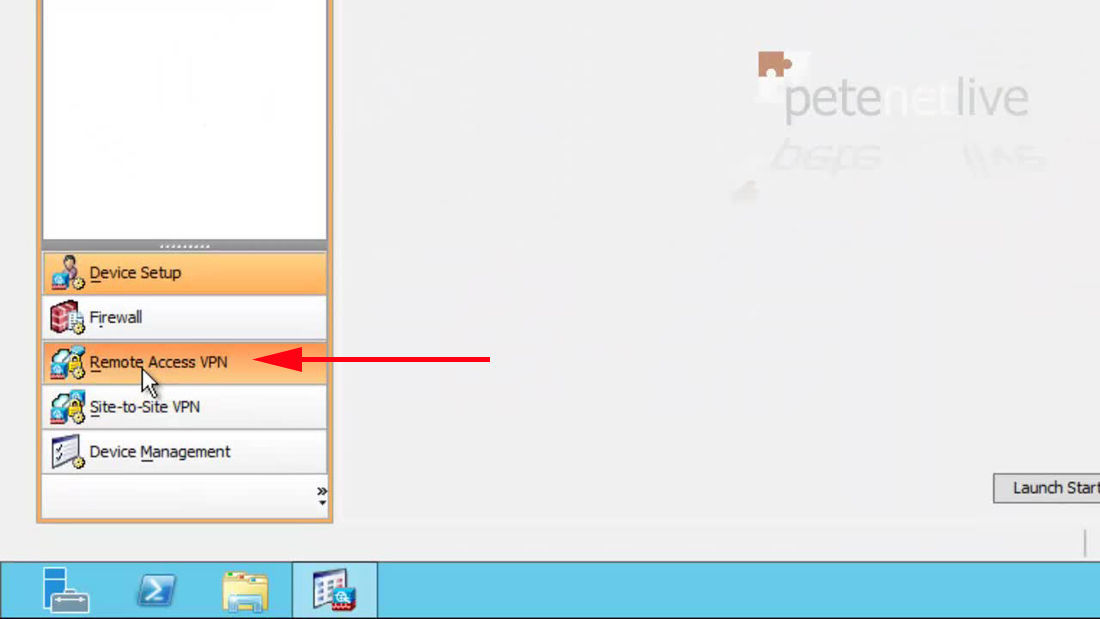
2. Remote Access VPN.
3. AAA Local Users > AAA Server Groups.
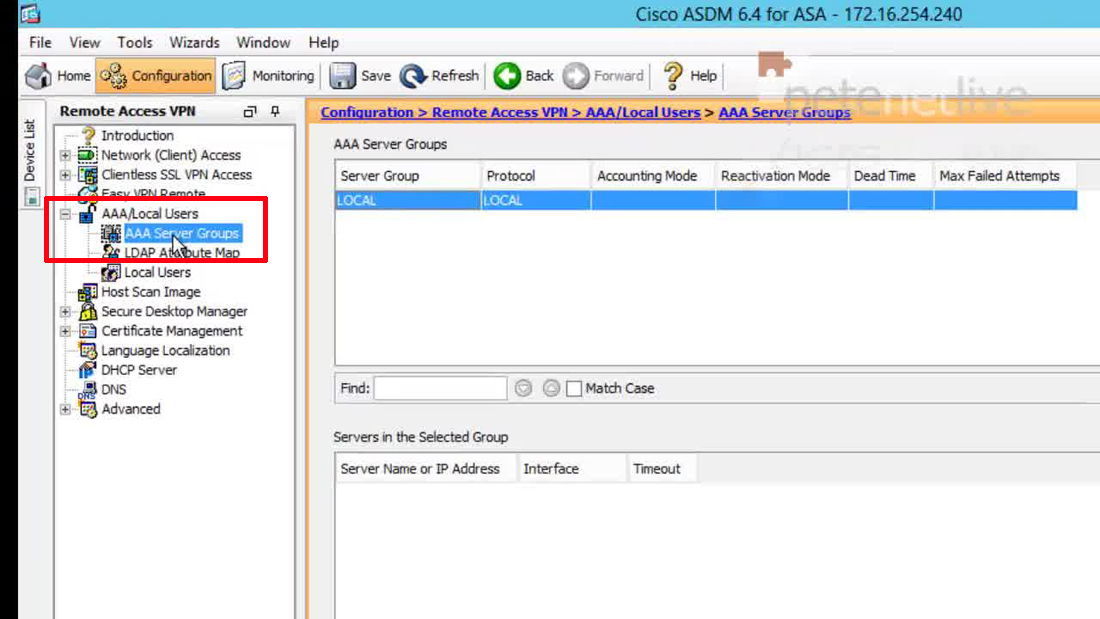
4. In the Server group section > Add.

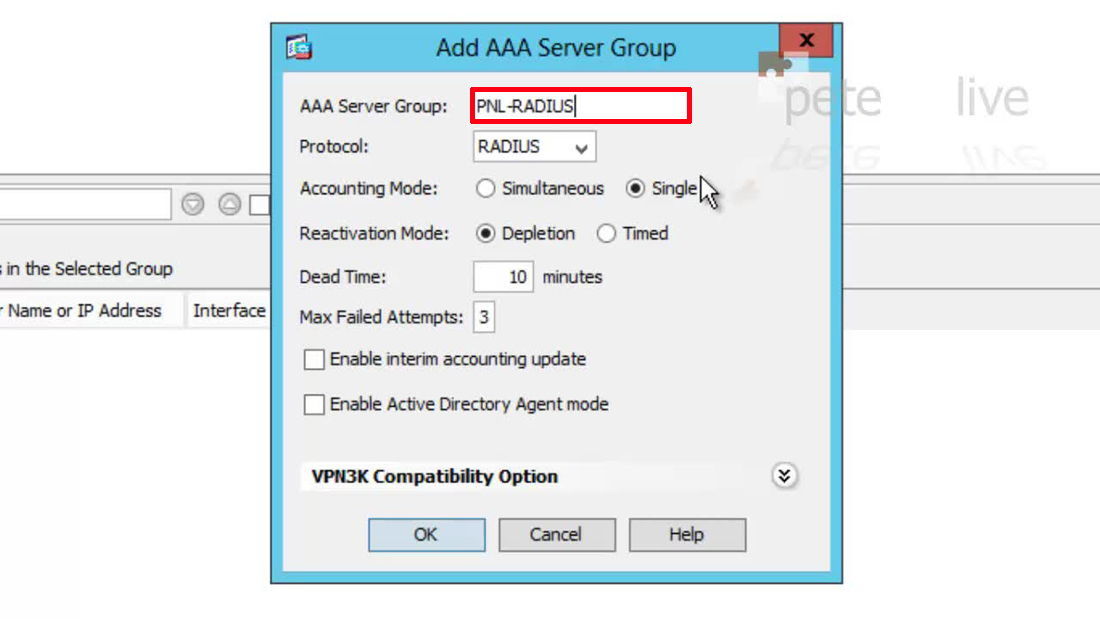
5. Give the group a name and accept the defaults > OK.
6. Now (with the group selected) > In the bottom (Server) section > Add.

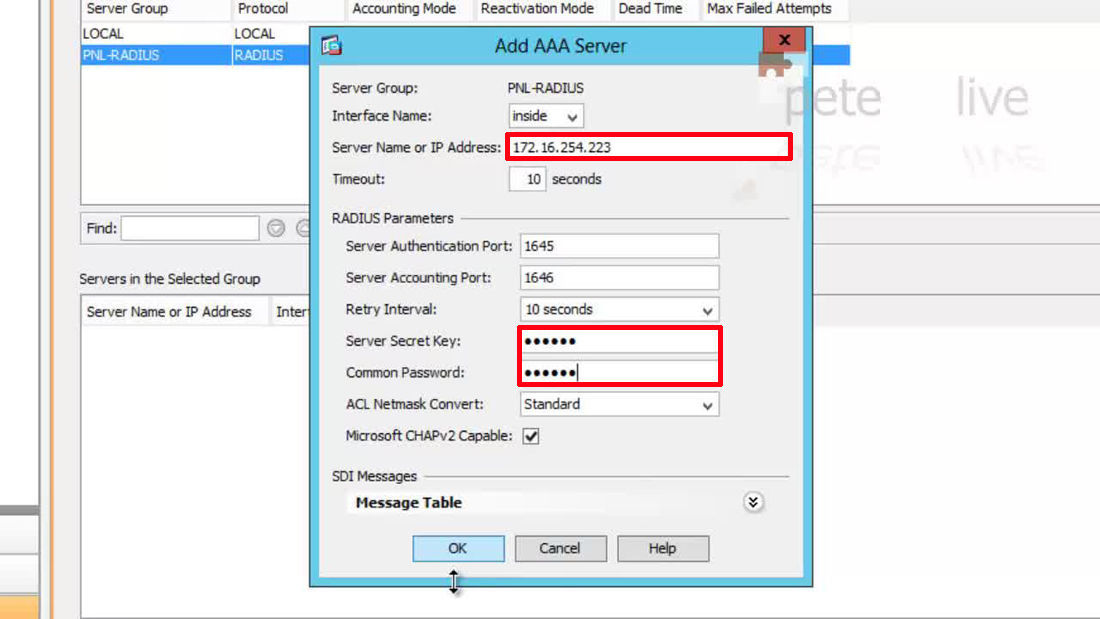
7. Specify the IP address, and a shared secret that the ASA will use with the 2012 Server performing RADIUS > OK.
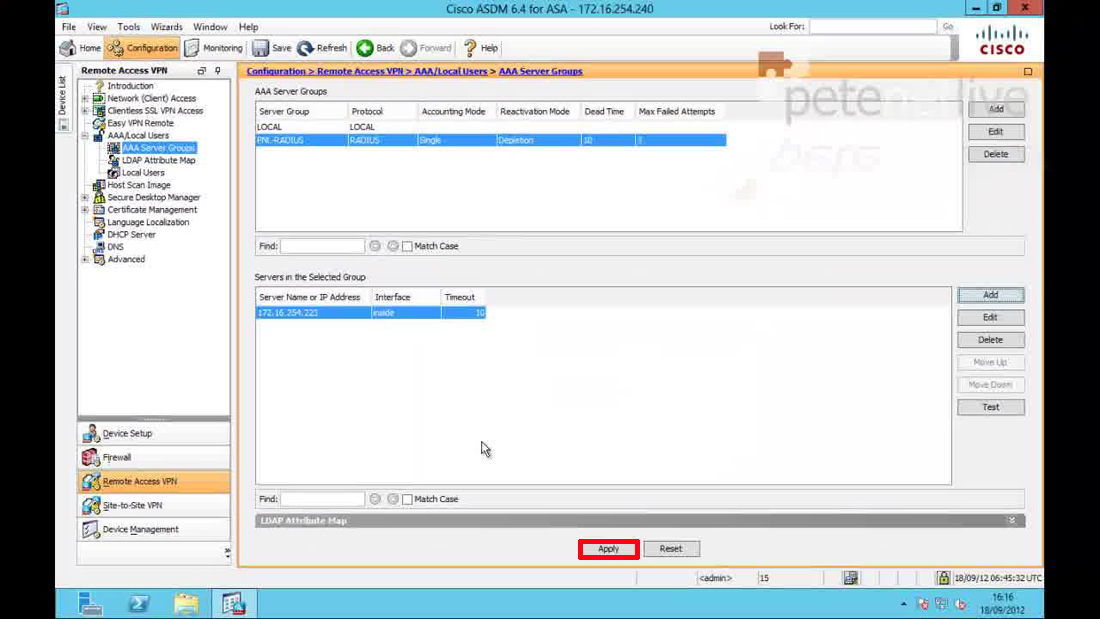
8. Apply.
Configure AAA RADIUS from command line;
aaa-server PNL-RADIUS protocol radius
aaa-server PNL-RADIUS (inside) host 172.16.254.223
 key 123456
 radius-common-pw 123456
 exit
Step 2 Configure Windows 2012 Server to allow RADIUS
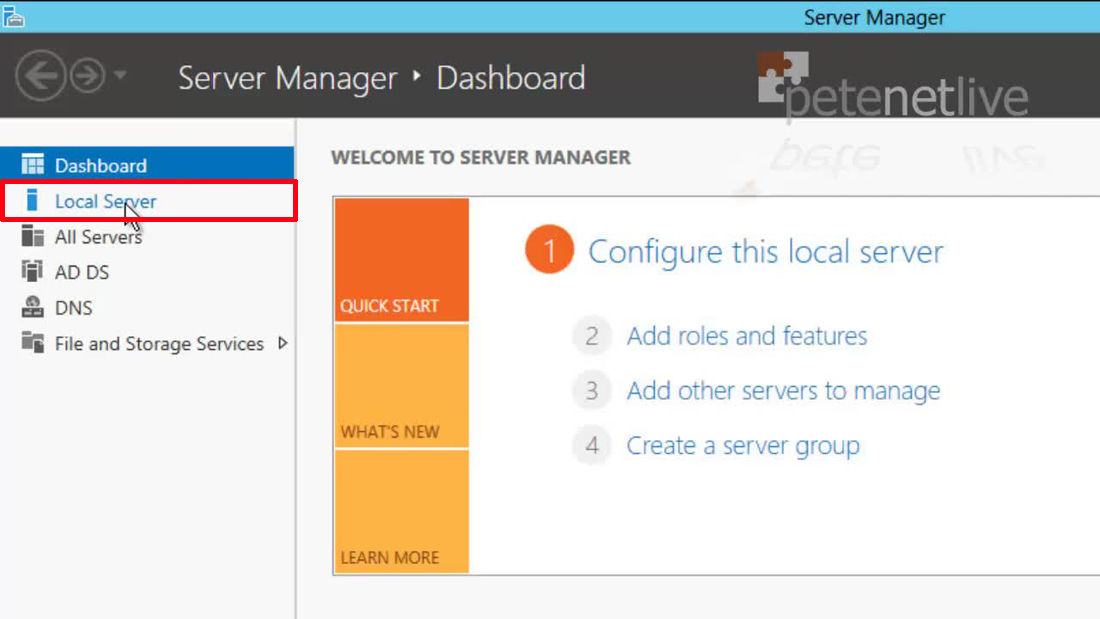
9. On the Windows 2012 Server > Launch Server Manager > Local Server.
10. Manage > Add Roles and Features.

11. If you get an initial welcome page, tick the box to ‘skip’ > Next > Accept the ‘Role based or feature based installation’ > Next.
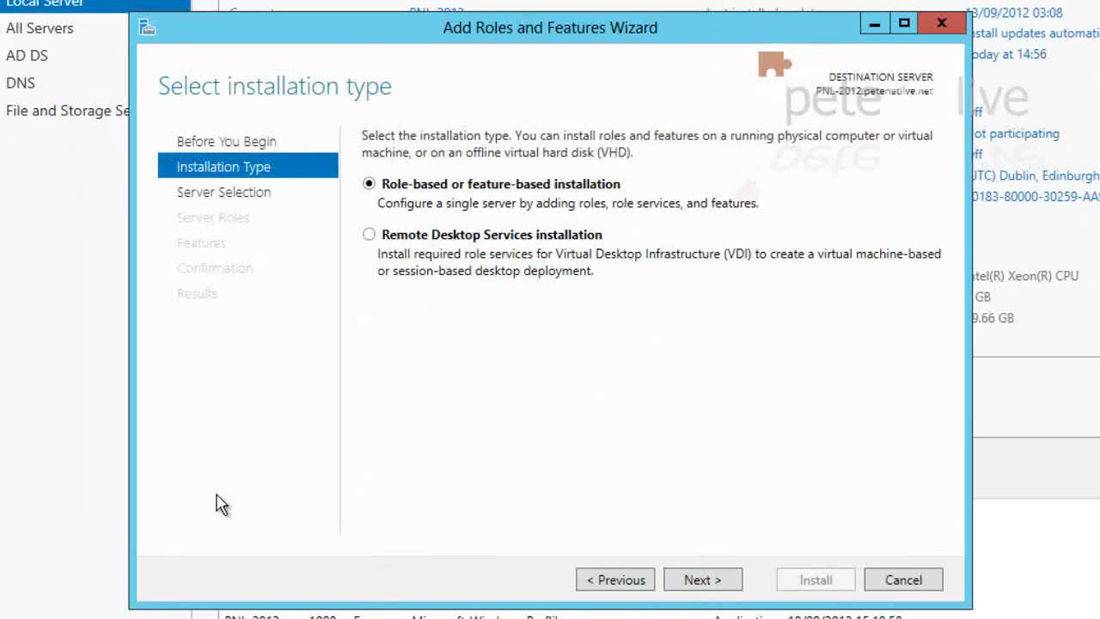
12. We are installing locally > Next.

13. Add ‘Network Policy and Access Server’ > Next.
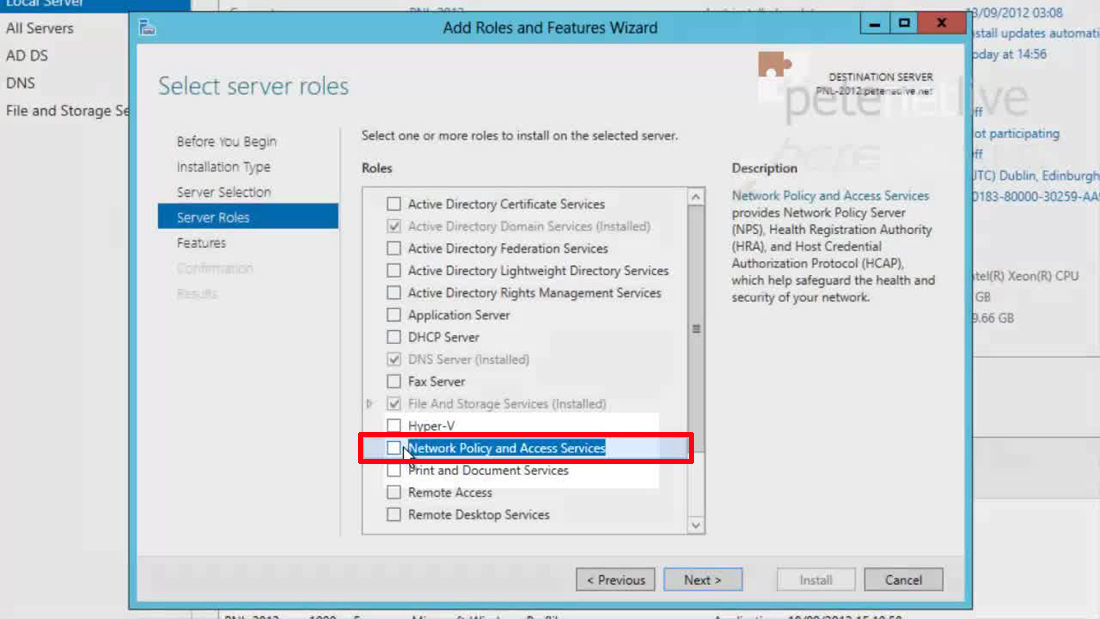
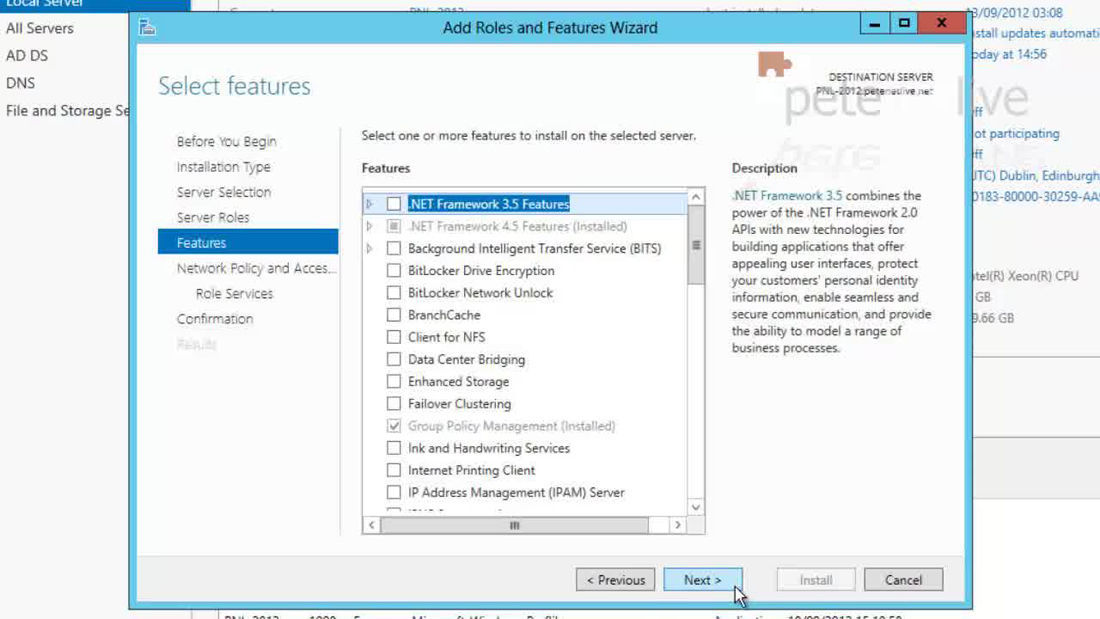
14. Add Features.

15. Next.
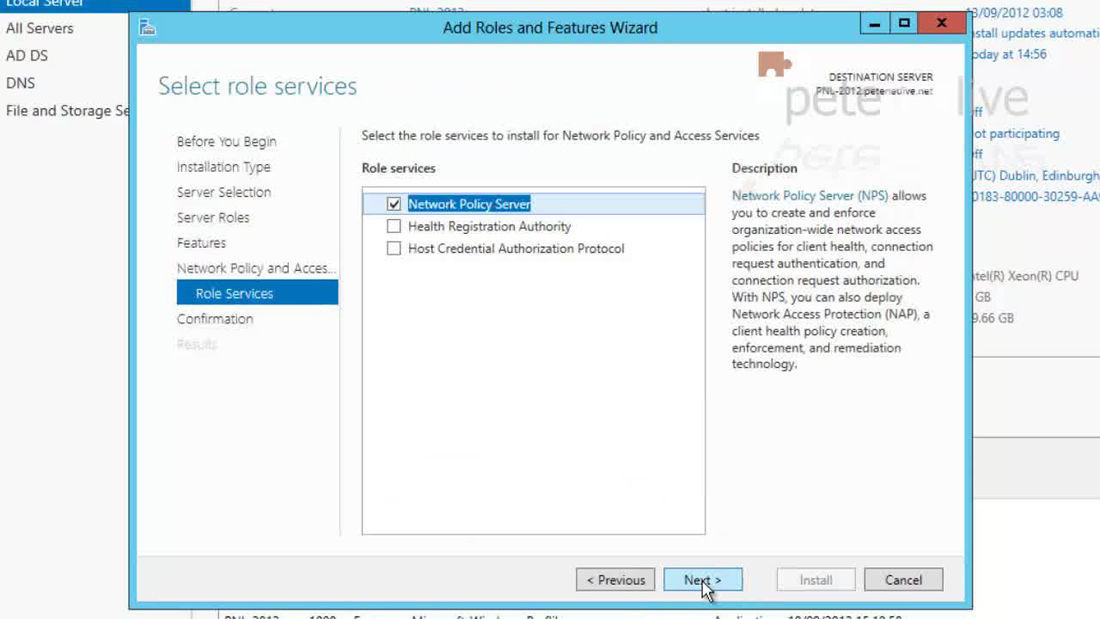
16. Next.

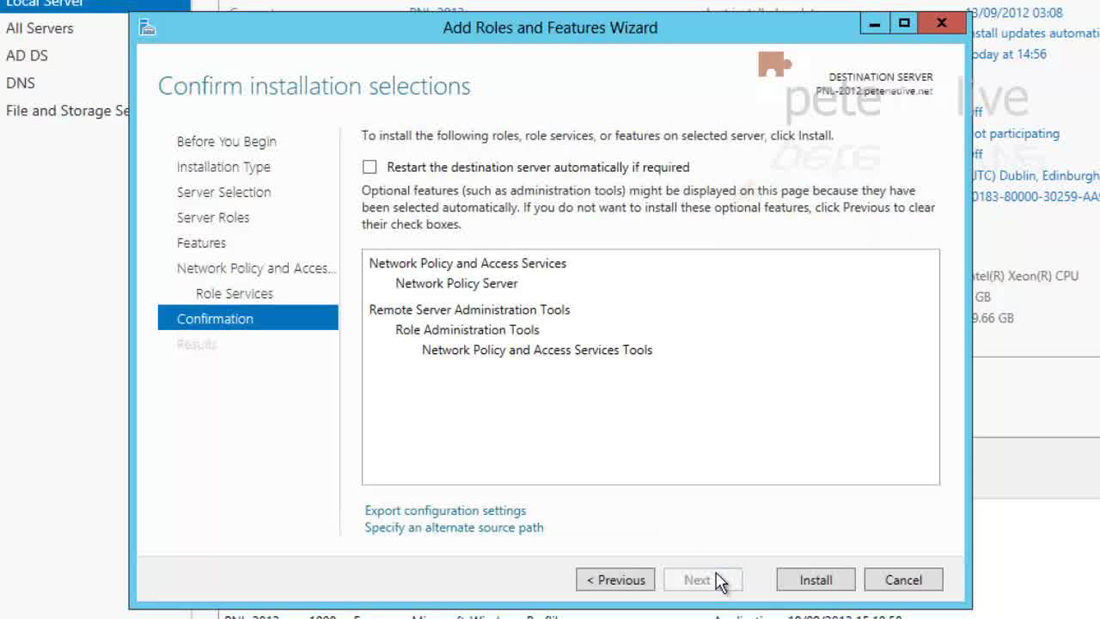
17. Next.
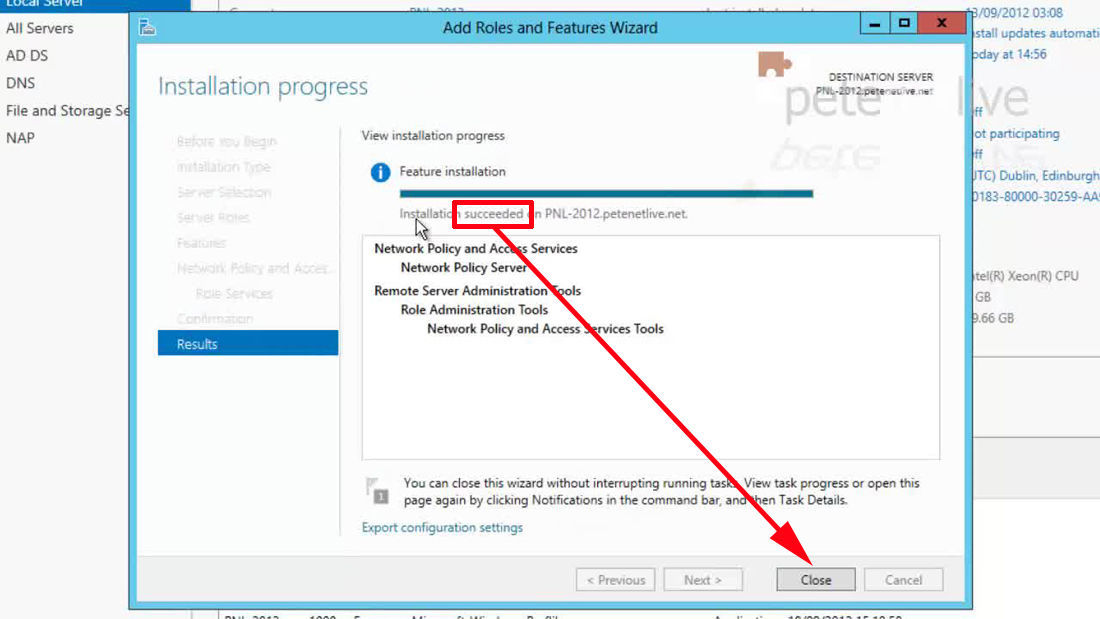
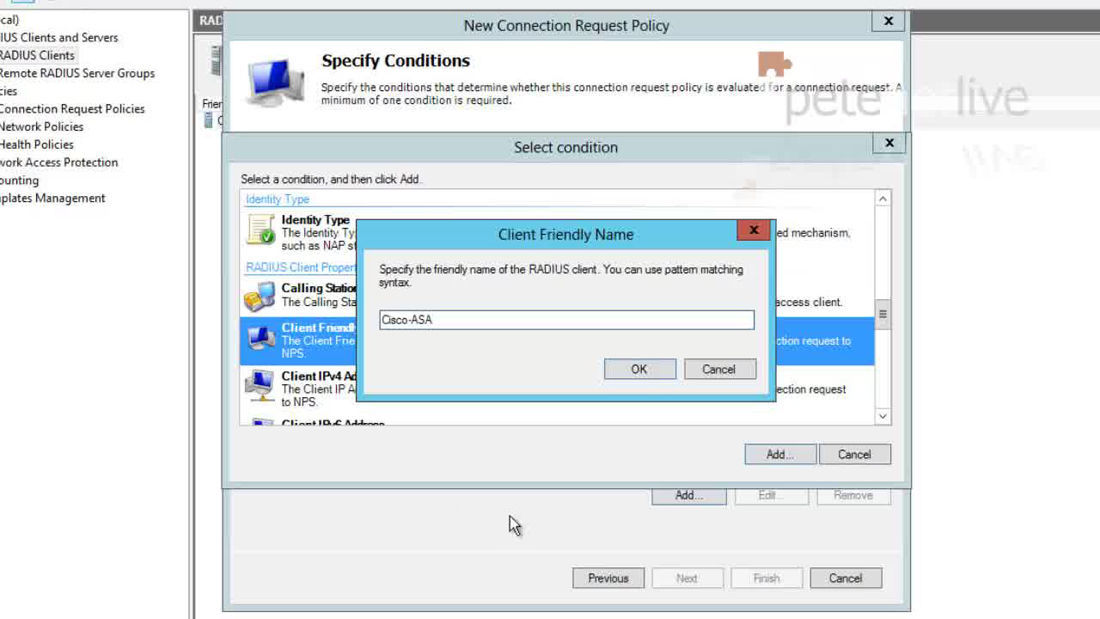
18. Install.
19. When complete > Close.
20. Select NPAS (Server 2016), or NAP (Server 2012).

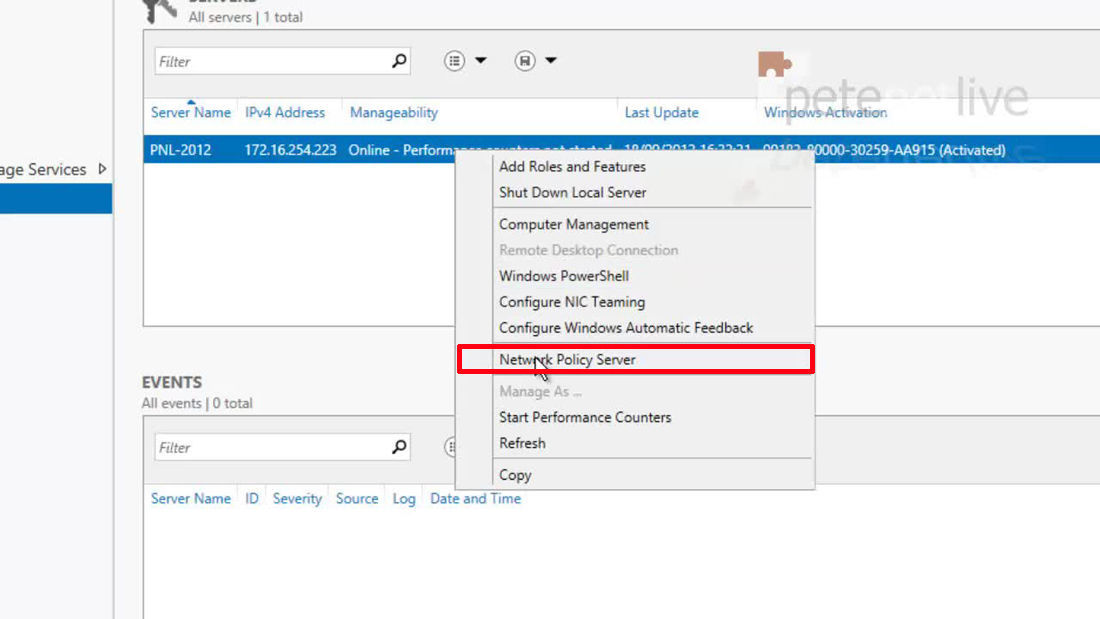
21. Right click the server > Network Policy Server.
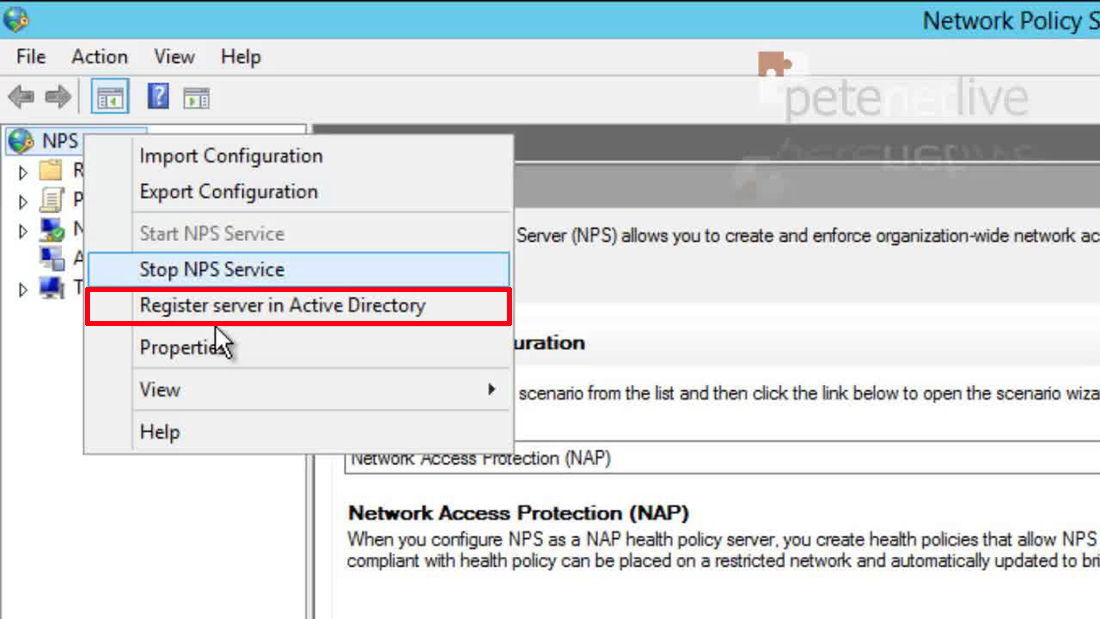
22. Right click NPS > Register server in Active Directory.
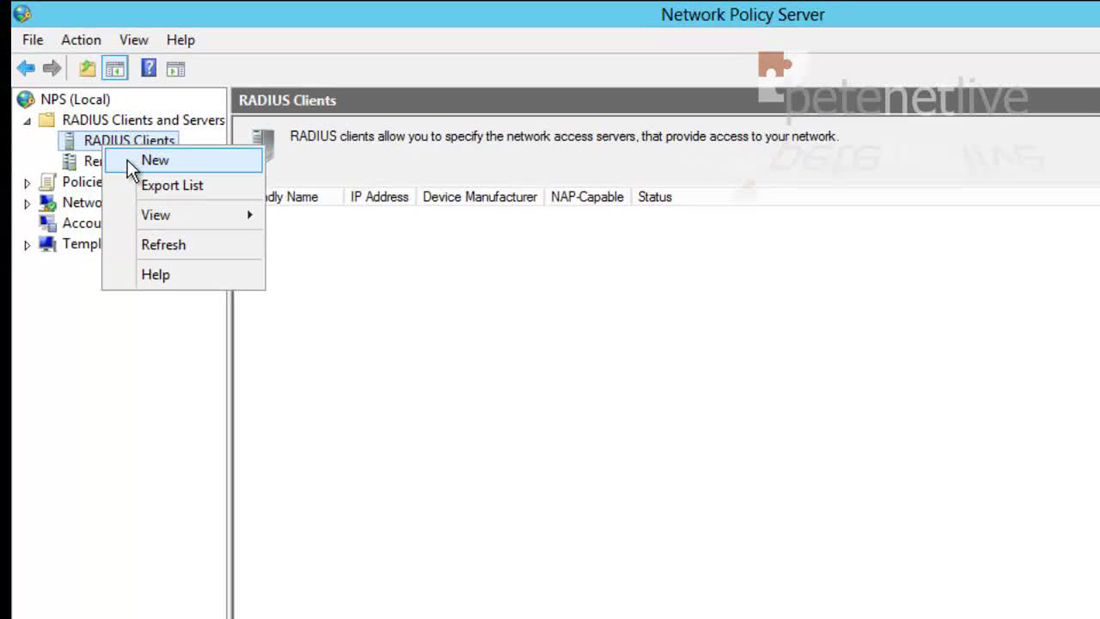
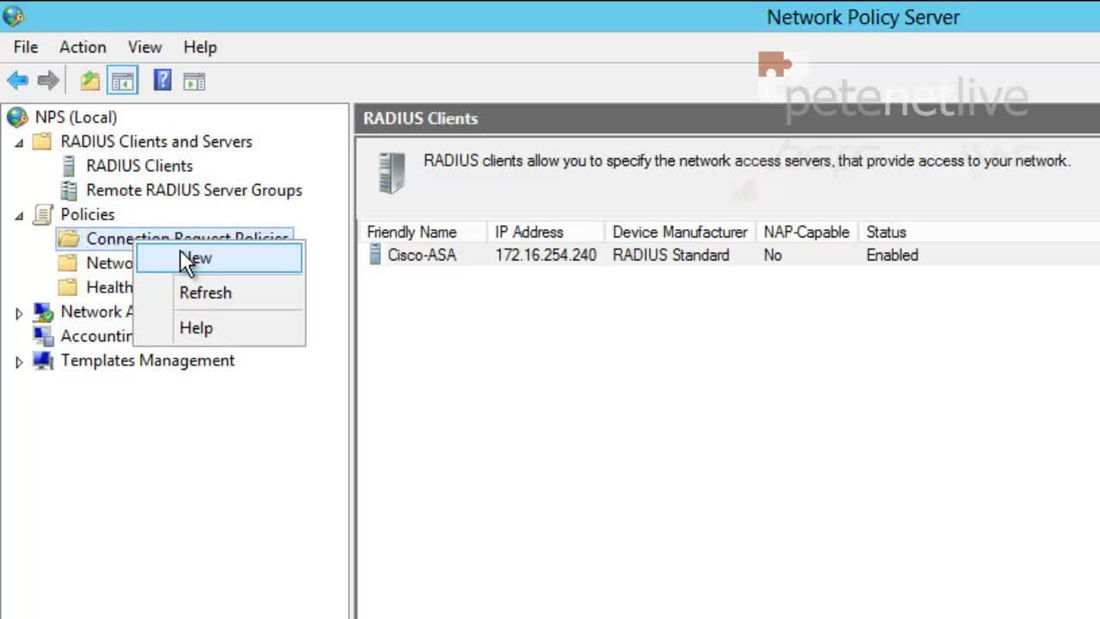
23. Expand RADIUS > right click RADIUS clients > New.
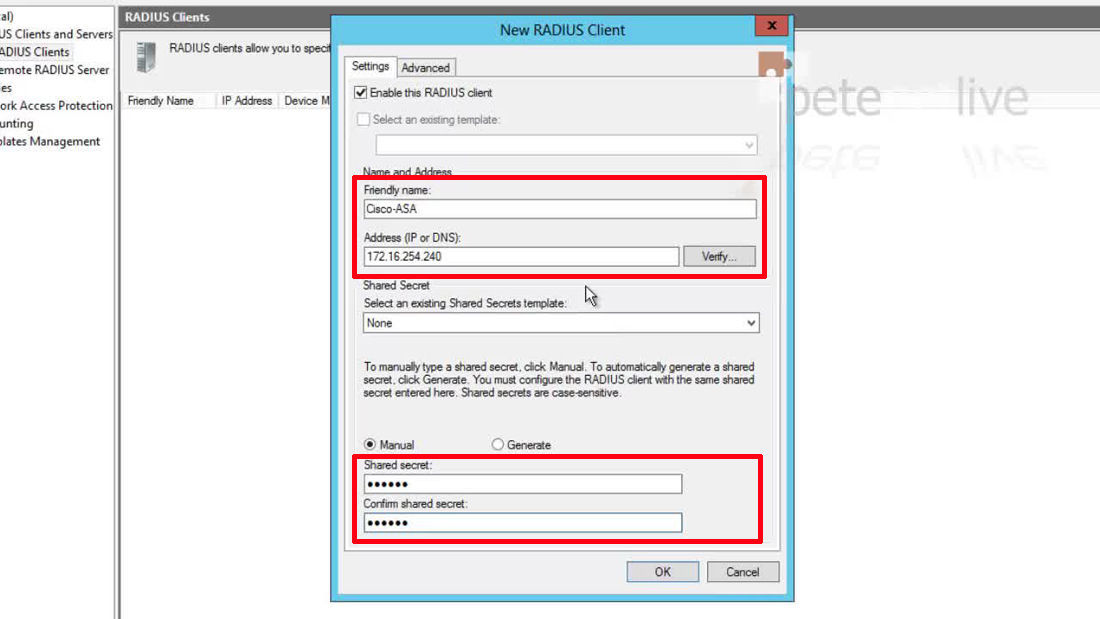
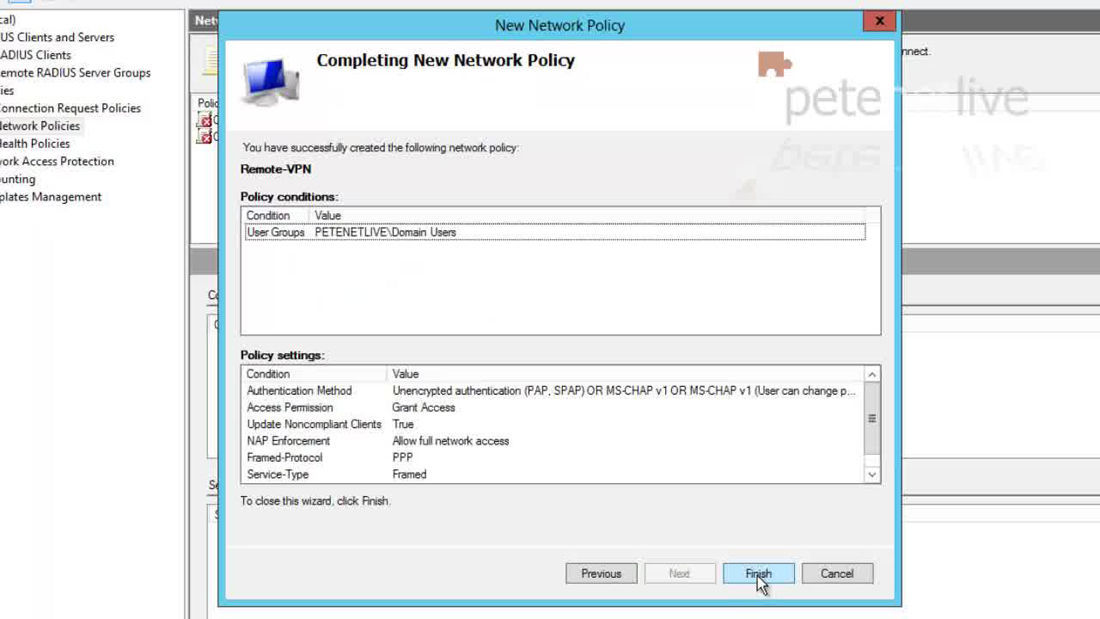
24. Give the firewall a friendly name, (take note of what this is, you will need it again) > Specify its IP > Enter the shared secret you setup above (number 7) > OK.
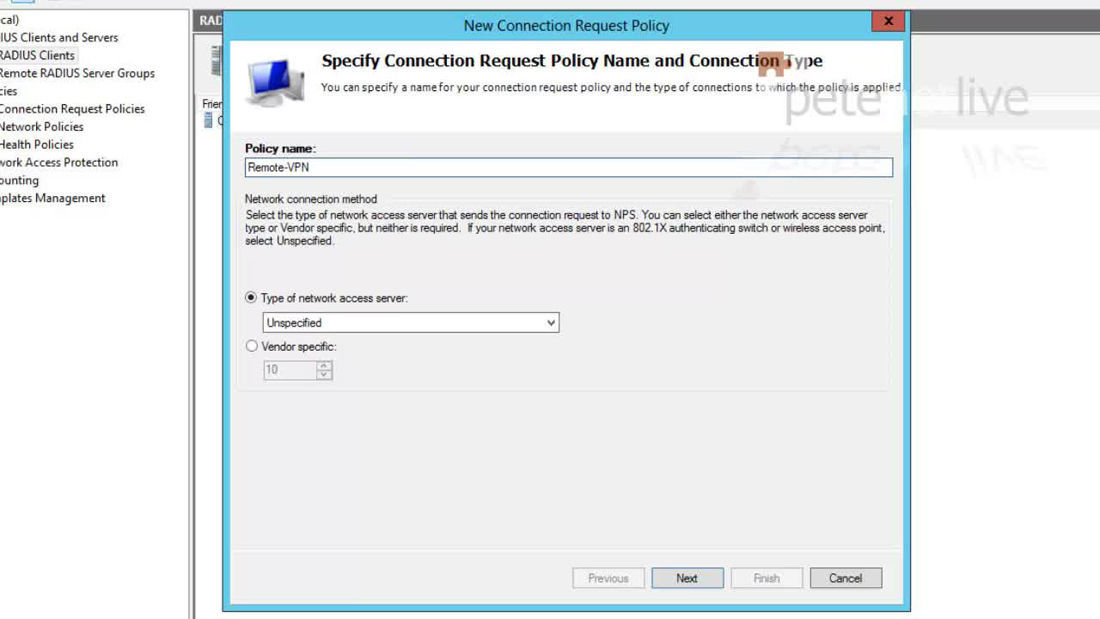
25. Expand policies > right click ‘Connection Request Policies’ > New.
26. Give the policy a name > Next.
27. Add a condition > Set the condition to ‘Client Friendly Name’ > Add.
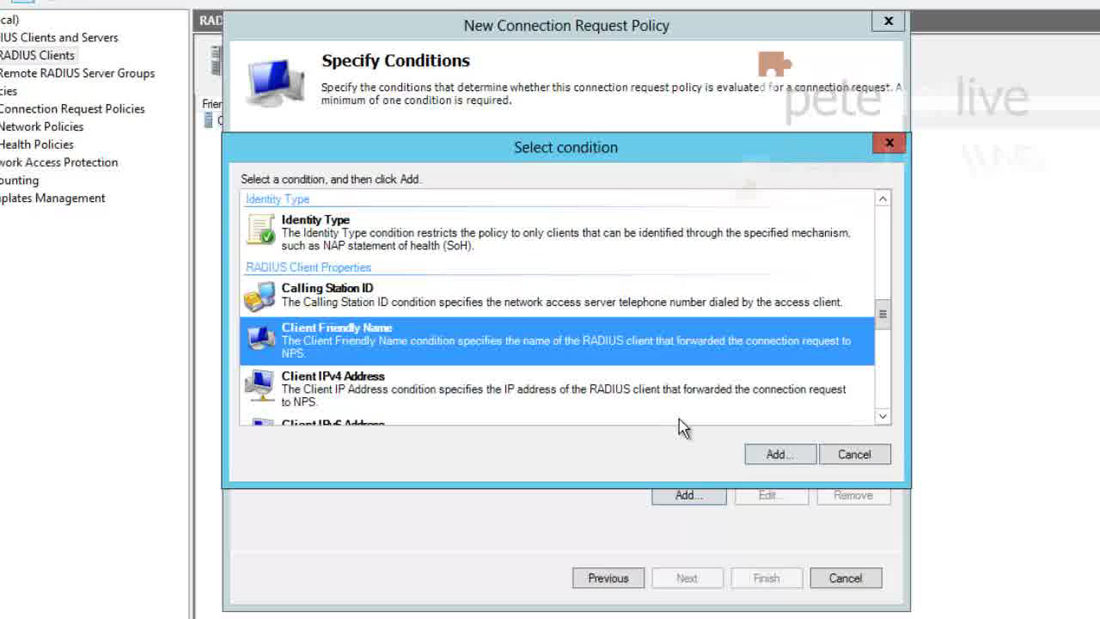
28. Specify the name you set up above (number 24) > OK > Next.
29. Next.
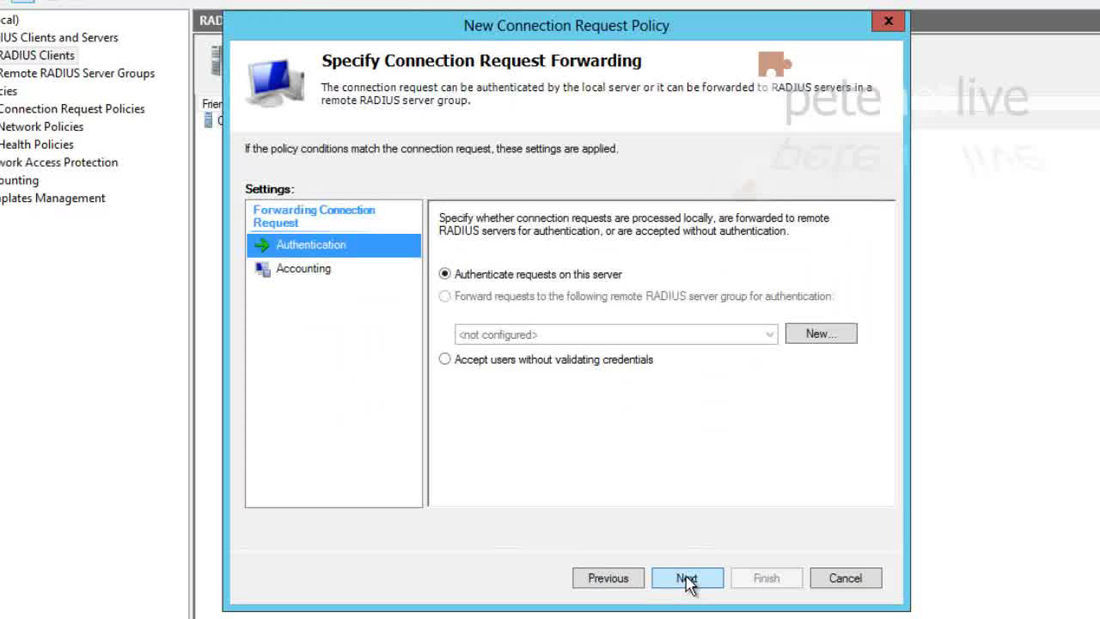
30. Next.
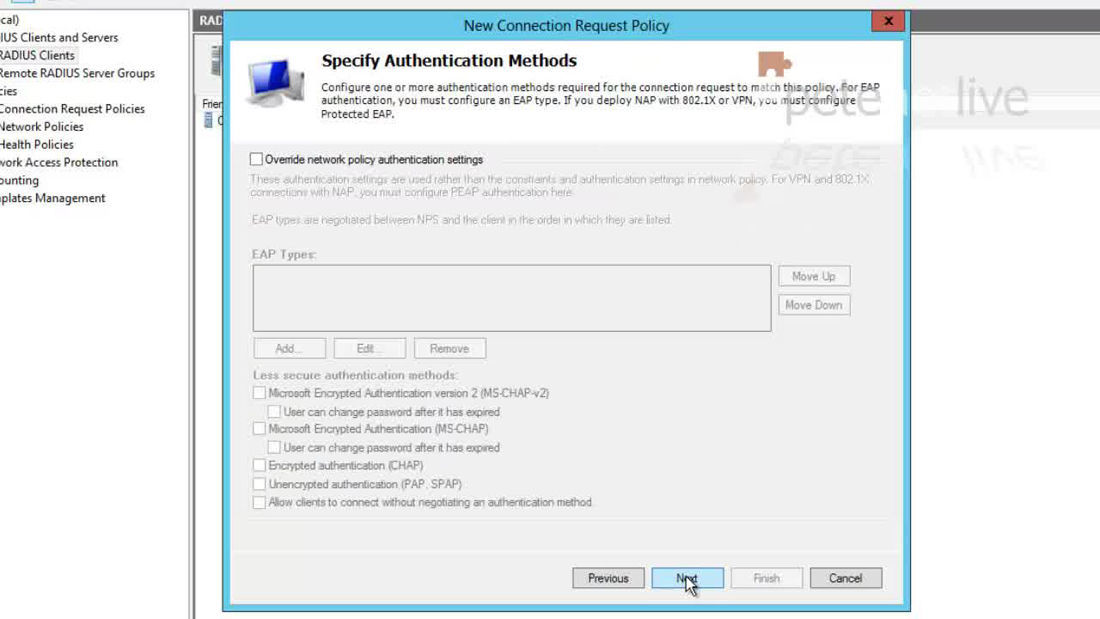
31. Change the attribute to ‘User-Name’ > Next.

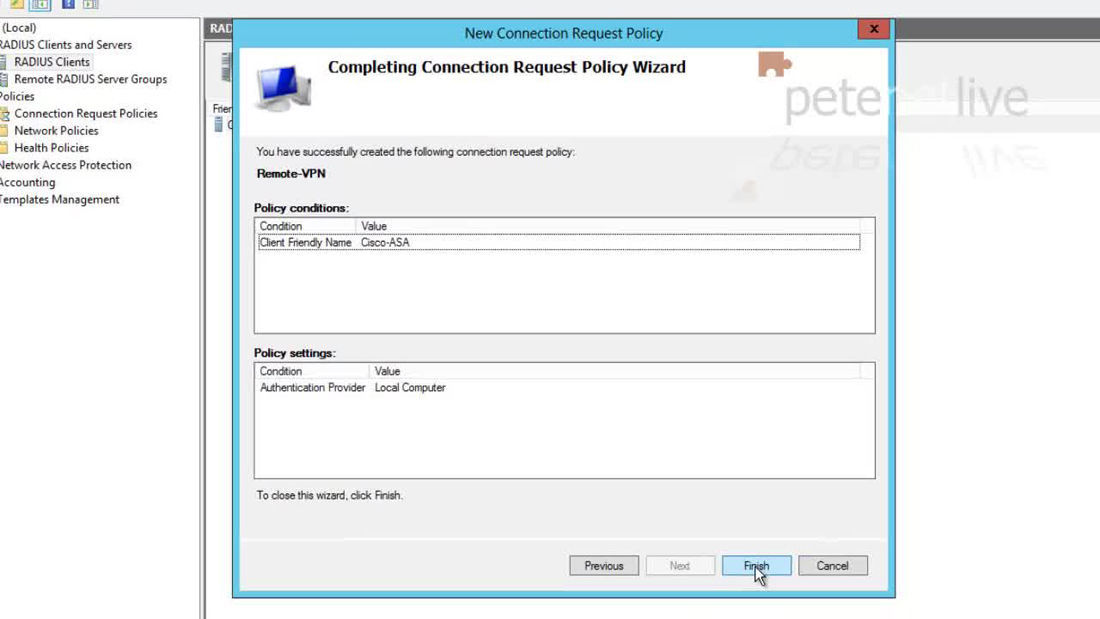
32. Finish.
33. Now right click ‘Network Policies’ > New.
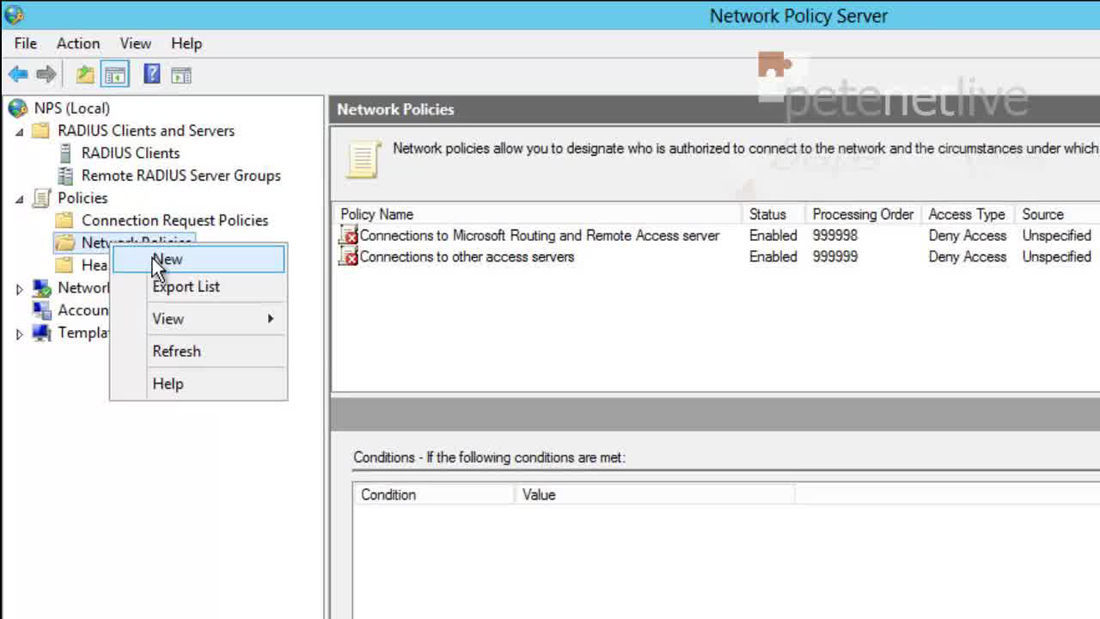
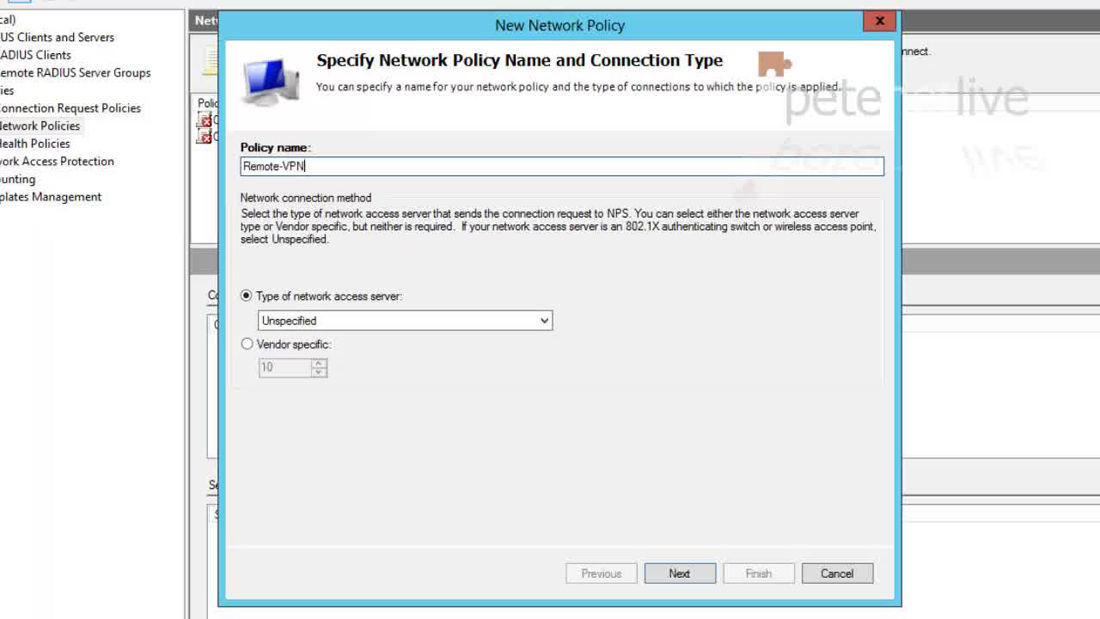
34. Give the policy a name> Next.
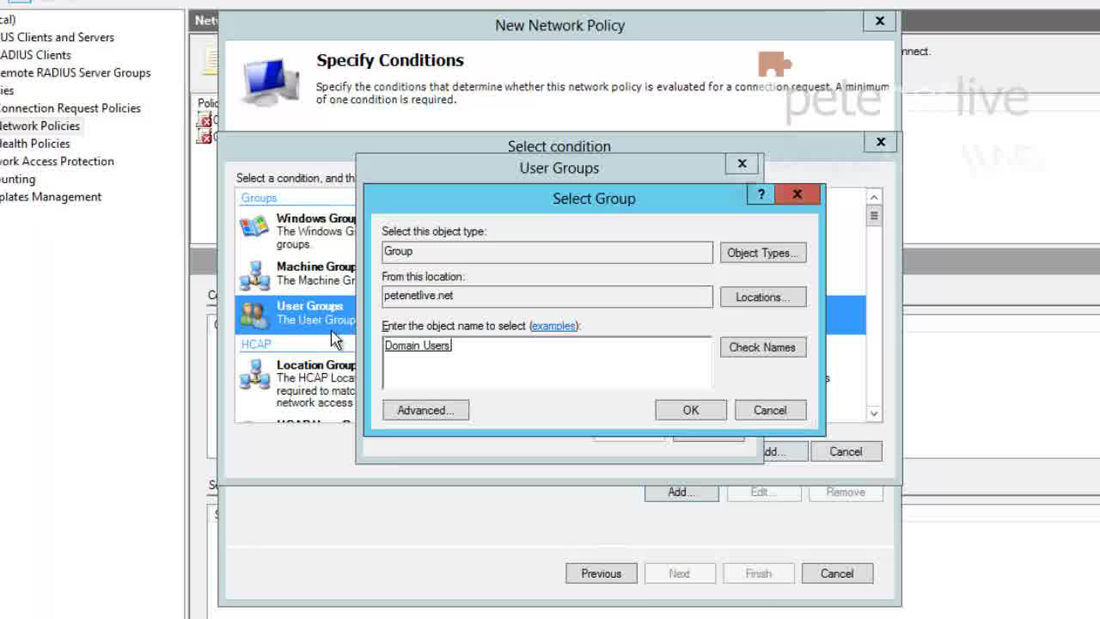
35. Add a condition > User Groups.

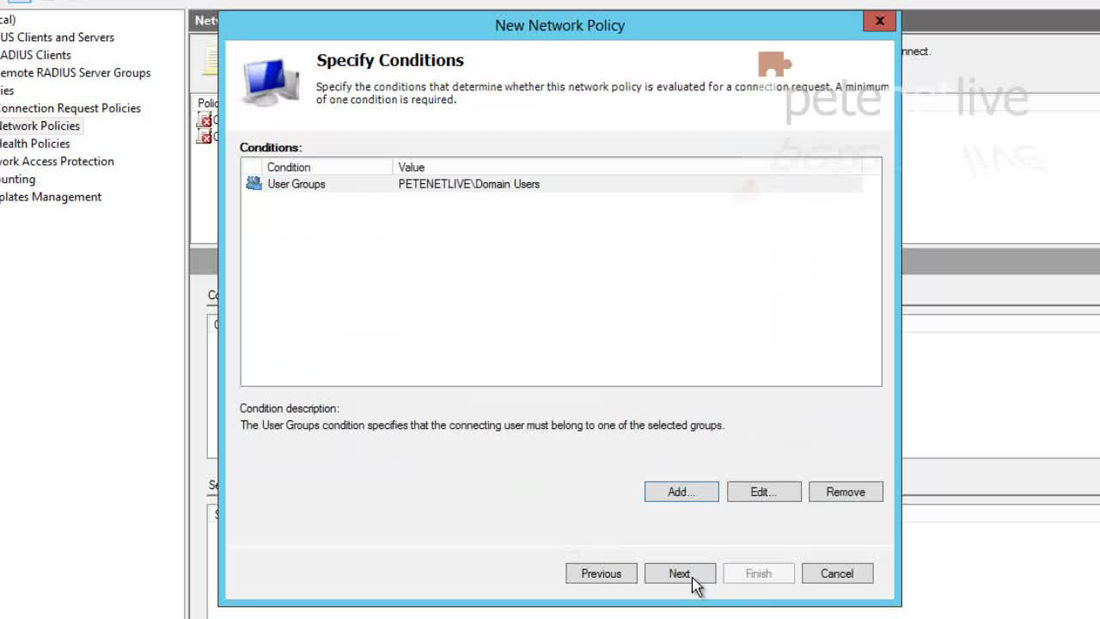
36. Add in the AD security group you want to allow access to > OK > Next.
37. Next.
38. Access Granted > Next.
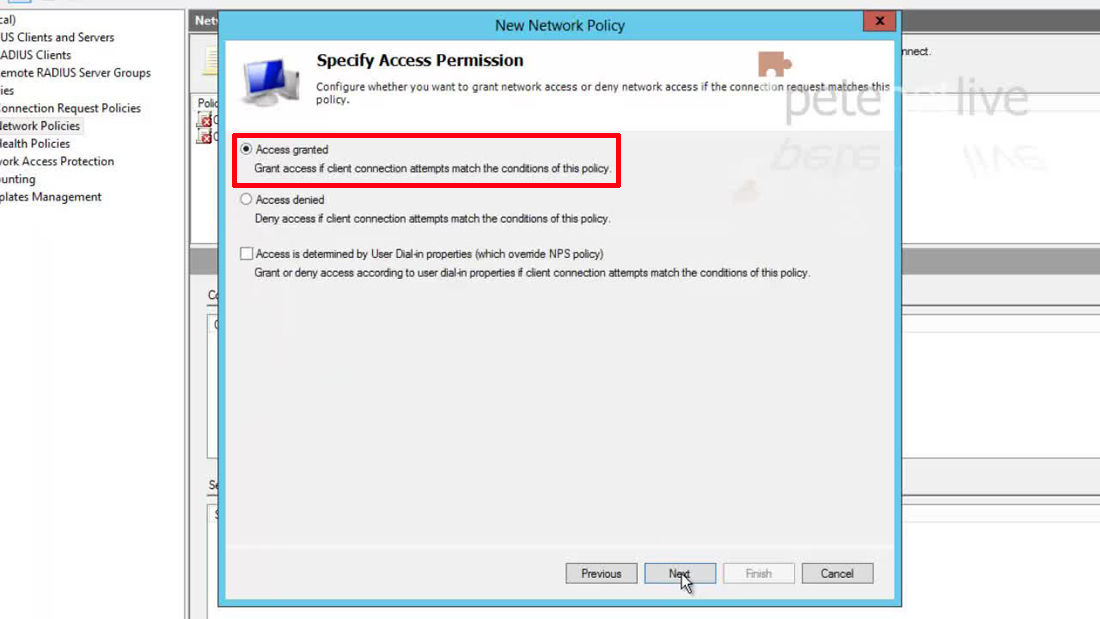
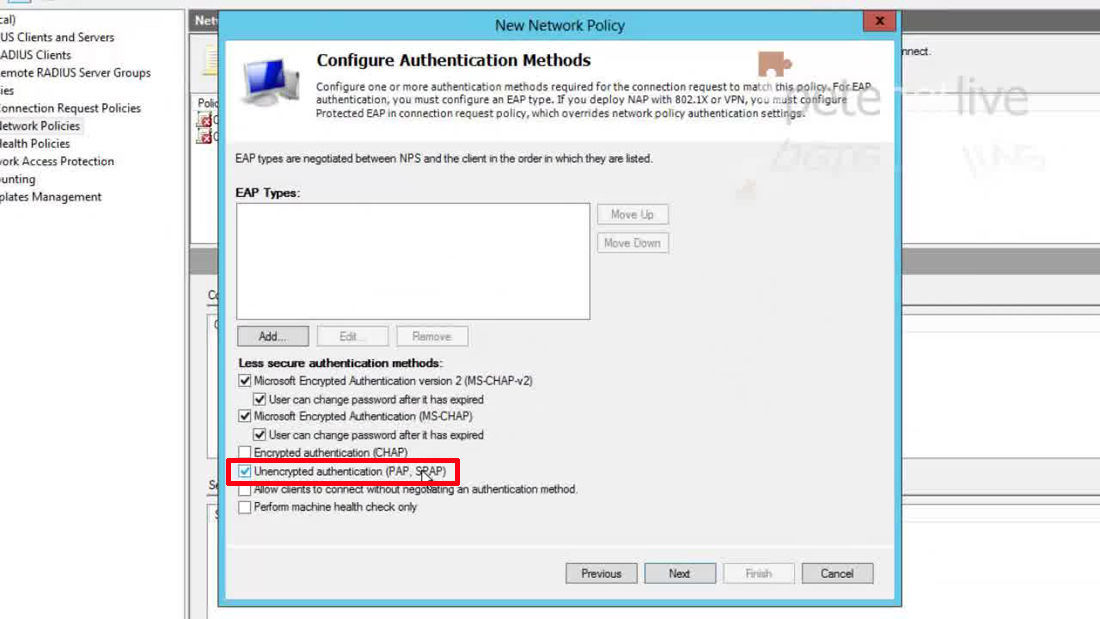
39. Select ‘Unencrypted Authentication PAP SPAP” > Next.
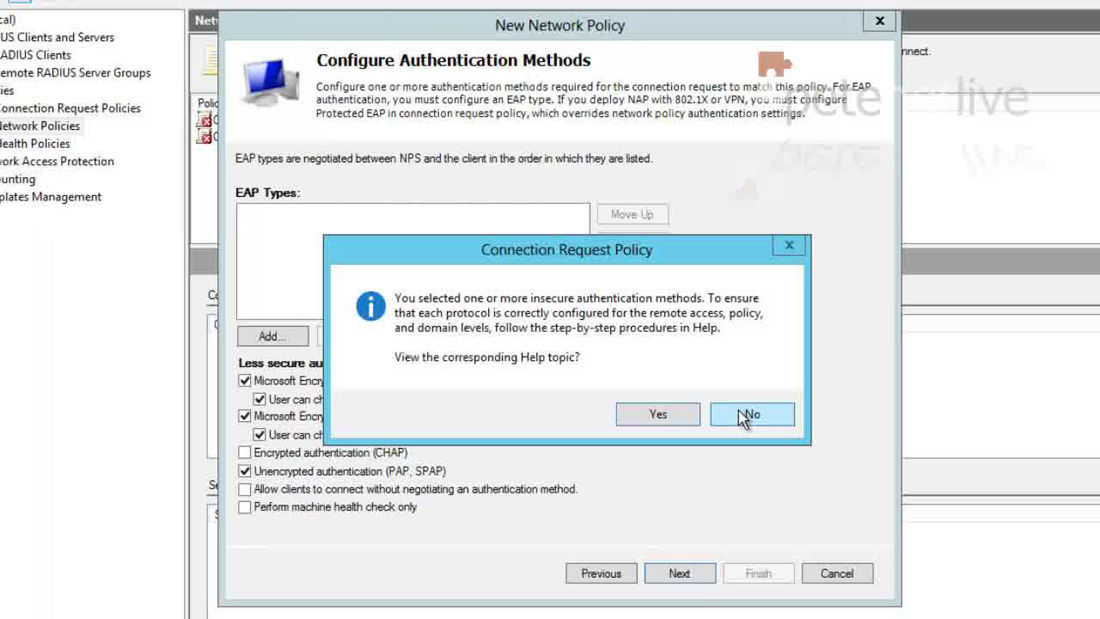
40. Select No.
41. Next.
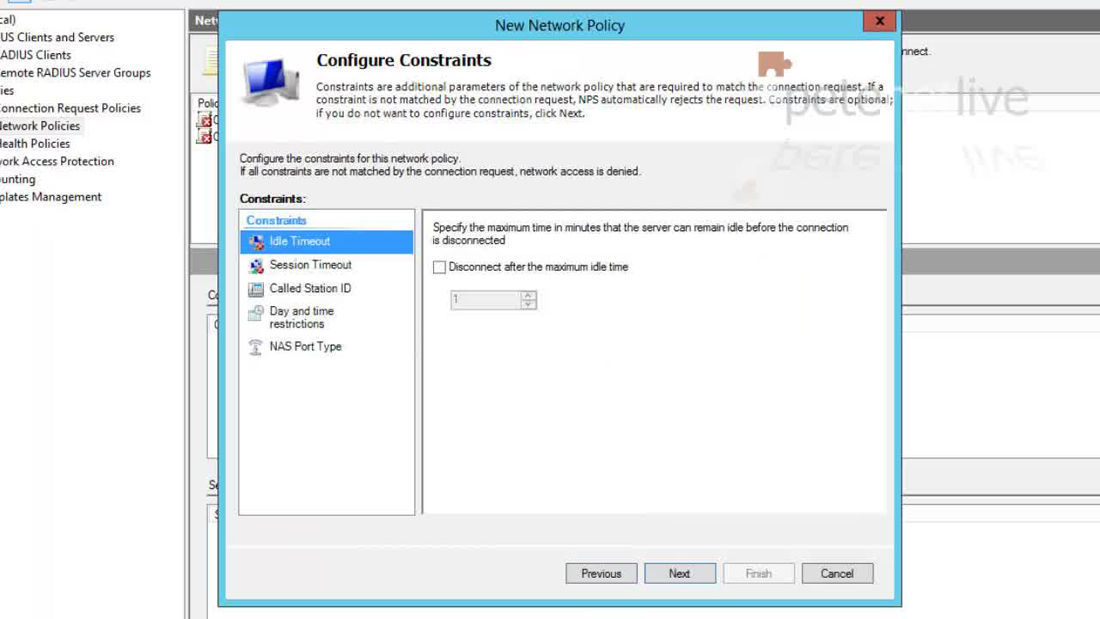
42. Next.

43. Finish.
Step 3 Test RADIUS Authentication
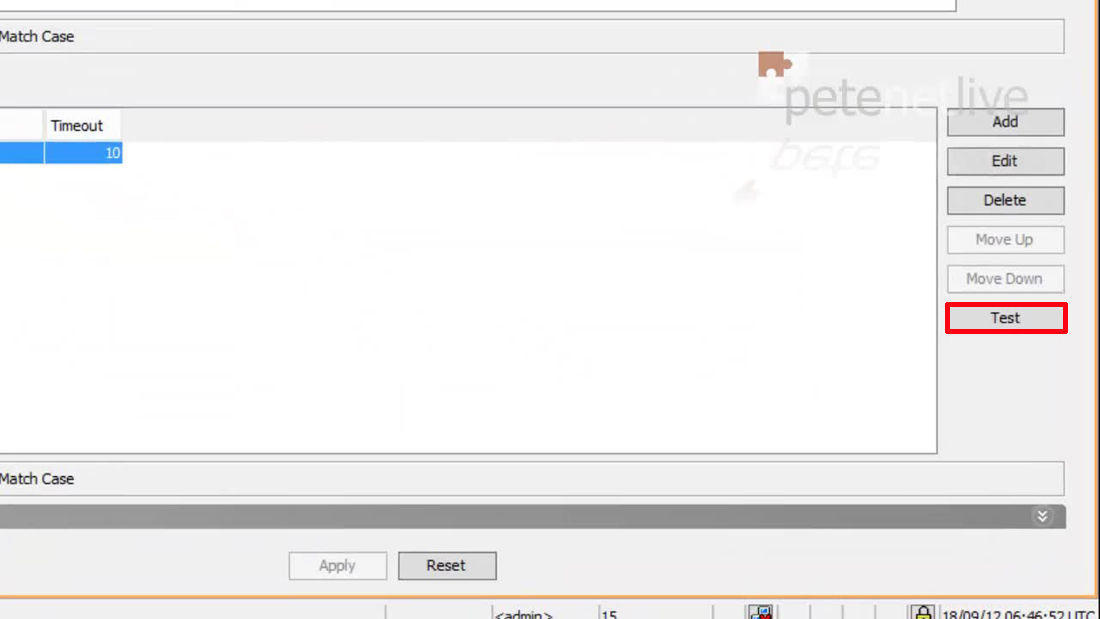
44. Back at the ASDM, in the same page you were in previously, select your server and then click ‘Test’.
45. Change the selection to Authentication > Enter your domain credentials > OK.
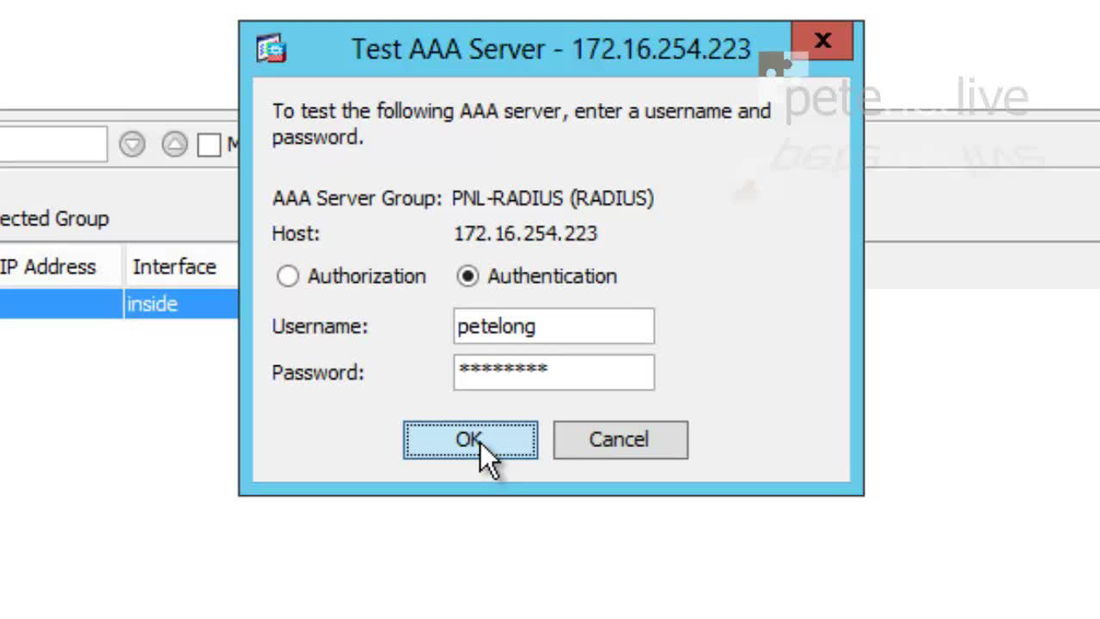
46. You are looking for a successful outcome.
Note: if it fails check there is physical connectivity between the two devices, the shared secrets match. Also ensure UDP ports 1645 and 1646 are not being blocked.

To Test AAA RADIUS Authentication from Command Line
test aaa-server authentication PNL-RADIUS host 172.16.254.223 username petelong password password123
47. Finally, save the firewall changes > File > Save running configuration to flash.

Related Articles, References, Credits, or External Links
Windows Server 2003 – Configure RADIUS for Cisco ASA 5500 Authentication
Windows Server 2008 R2 – Configure RADIUS for Cisco ASA 5500 Authentication
评论